@workInProgress
@ngdoc overview
@name Getting Started
@description
# Hello World!
A great way for you to get started with `angular` is to create the tradtional
"Hello World!" app:
1. In your favorite text editor, create an HTML file
(for example, `helloworld.html`).
2. From the __Source__ box below, copy and paste the code into your HTML file.
(Double-click on the source to easily select all.)
3. Open the file in your web browser.
Hello {{'World'}}!
The resulting web page should look something like the following:
Now let's take a closer look at that code, and see what is going on behind
the scenes.
The first line of interest defines the `ng` namespace, which makes
`angular` work across all browsers (especially important for IE):
The next line downloads the `angular` script, and instructs `angular` to process
the entire HTML page when it is loaded:
(For details on what happens when `angular` processes an HTML page,
see {@link guide.bootstrap Bootstrap}.)
Finally, this line in the `` of the page is the template that describes
how to display our greeting in the UI:
Hello {{'World'}}!
Note the use of the double curly brace markup (`{{ }}`) to bind the expression to
the greeting text. Here the expression is the string literal 'World'.
Next let's look at a more interesting example, that uses `angular` to
bind a dynamic expression to our greeting text.
# Hello World!
This example demonstrates `angular`'s two-way data binding:
1. Edit the HTML file you created in the "Hello World!" example above.
2. Replace the contents of `` with the code from the __Source__ box below.
3. Refresh your browswer window.
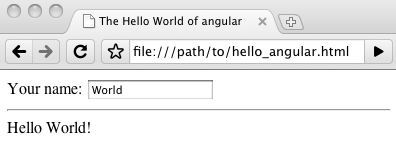
Your name:
Hello {{yourname}}!
After the refresh, the page should look something like this:
These are some of the important points to note from this example:
* The text input {@link angular.widget widget} called `yourname` is bound to a model variable called
`yourname`.
* The double curly braces notation binds the variable `yourname` to the
greeting text.
* You did not need to explicitly register an event listener or define an event
handler for events!
Now try typing your name into the input box, and notice the immediate change to
the displayed greeting. This demonstrates the concept of `angular`'s
{@link guide.data-binding bi-directional data binding}. Any changes to the input field are immediately
reflected in the model (one direction), and any changes to the model are
reflected in the greeting text (the other direction).
# Anatomy of an `angular` App
This section describes the 3 parts of an `angular` app, and explains how they
map to the Model-View-Controller design pattern:
## Templates
Templates, which you write in HTML and CSS, serve as the View. You add elements,
attributes, and markup to HTML, which serve as instructions to the `angular`
compiler. The `angular` compiler is fully extensible, meaning that with angular
you can build your own declarative language on top of HTML!
## Application Logic and Behavior
Application Logic and Behavior, which you define in JavaScript, serve as the
Controller. With `angular` (unlike with standard AJAX applications) you don't
need to write additional listeners or DOM manipulators, because they are built-in.
This feature makes your application logic very easy to write, test, maintain, and
understand.
## Scope
The Model consists of one or more JavaScript objects, arrays, or primitive types.
These are referenced from the scope. There are no restrictions on what the Model
can be or what structure it should have. The only requirement is that it is
referenced by the scope.
The following illustration shows the parts of an `angular` application and how they
work together:
In addition, `angular` comes with a set of Services, which have the following
properties:
* The services provided are very useful for building web applications.
* You can extend and add application-specific behavior to services.
* Services include Dependency-Injection, XHR, caching, URL routing,
and browser abstraction.
# Where To Go Next
* For additional hands-on examples of using `angular`, including more source
code that you can copy and paste into your own pages, take a look through
the `angular` {@link Cookbook}.
* For explanations of the `angular` concepts presented in the examples on this
page, see the {@link guide Developer Guide}.
 Now let's take a closer look at that code, and see what is going on behind
the scenes.
The first line of interest defines the `ng` namespace, which makes
`angular` work across all browsers (especially important for IE):
Now let's take a closer look at that code, and see what is going on behind
the scenes.
The first line of interest defines the `ng` namespace, which makes
`angular` work across all browsers (especially important for IE):
 These are some of the important points to note from this example:
* The text input {@link angular.widget widget} called `yourname` is bound to a model variable called
`yourname`.
* The double curly braces notation binds the variable `yourname` to the
greeting text.
* You did not need to explicitly register an event listener or define an event
handler for events!
Now try typing your name into the input box, and notice the immediate change to
the displayed greeting. This demonstrates the concept of `angular`'s
{@link guide.data-binding bi-directional data binding}. Any changes to the input field are immediately
reflected in the model (one direction), and any changes to the model are
reflected in the greeting text (the other direction).
# Anatomy of an `angular` App
This section describes the 3 parts of an `angular` app, and explains how they
map to the Model-View-Controller design pattern:
## Templates
Templates, which you write in HTML and CSS, serve as the View. You add elements,
attributes, and markup to HTML, which serve as instructions to the `angular`
compiler. The `angular` compiler is fully extensible, meaning that with angular
you can build your own declarative language on top of HTML!
## Application Logic and Behavior
Application Logic and Behavior, which you define in JavaScript, serve as the
Controller. With `angular` (unlike with standard AJAX applications) you don't
need to write additional listeners or DOM manipulators, because they are built-in.
This feature makes your application logic very easy to write, test, maintain, and
understand.
## Scope
The Model consists of one or more JavaScript objects, arrays, or primitive types.
These are referenced from the scope. There are no restrictions on what the Model
can be or what structure it should have. The only requirement is that it is
referenced by the scope.
The following illustration shows the parts of an `angular` application and how they
work together:
These are some of the important points to note from this example:
* The text input {@link angular.widget widget} called `yourname` is bound to a model variable called
`yourname`.
* The double curly braces notation binds the variable `yourname` to the
greeting text.
* You did not need to explicitly register an event listener or define an event
handler for events!
Now try typing your name into the input box, and notice the immediate change to
the displayed greeting. This demonstrates the concept of `angular`'s
{@link guide.data-binding bi-directional data binding}. Any changes to the input field are immediately
reflected in the model (one direction), and any changes to the model are
reflected in the greeting text (the other direction).
# Anatomy of an `angular` App
This section describes the 3 parts of an `angular` app, and explains how they
map to the Model-View-Controller design pattern:
## Templates
Templates, which you write in HTML and CSS, serve as the View. You add elements,
attributes, and markup to HTML, which serve as instructions to the `angular`
compiler. The `angular` compiler is fully extensible, meaning that with angular
you can build your own declarative language on top of HTML!
## Application Logic and Behavior
Application Logic and Behavior, which you define in JavaScript, serve as the
Controller. With `angular` (unlike with standard AJAX applications) you don't
need to write additional listeners or DOM manipulators, because they are built-in.
This feature makes your application logic very easy to write, test, maintain, and
understand.
## Scope
The Model consists of one or more JavaScript objects, arrays, or primitive types.
These are referenced from the scope. There are no restrictions on what the Model
can be or what structure it should have. The only requirement is that it is
referenced by the scope.
The following illustration shows the parts of an `angular` application and how they
work together:
 In addition, `angular` comes with a set of Services, which have the following
properties:
* The services provided are very useful for building web applications.
* You can extend and add application-specific behavior to services.
* Services include Dependency-Injection, XHR, caching, URL routing,
and browser abstraction.
# Where To Go Next
* For additional hands-on examples of using `angular`, including more source
code that you can copy and paste into your own pages, take a look through
the `angular` {@link Cookbook}.
* For explanations of the `angular` concepts presented in the examples on this
page, see the {@link guide Developer Guide}.
In addition, `angular` comes with a set of Services, which have the following
properties:
* The services provided are very useful for building web applications.
* You can extend and add application-specific behavior to services.
* Services include Dependency-Injection, XHR, caching, URL routing,
and browser abstraction.
# Where To Go Next
* For additional hands-on examples of using `angular`, including more source
code that you can copy and paste into your own pages, take a look through
the `angular` {@link Cookbook}.
* For explanations of the `angular` concepts presented in the examples on this
page, see the {@link guide Developer Guide}.